
Improving TTFB in WordPress (Pt. 2): Front-End and CDN Optimizations
By Tomasz Zieliński
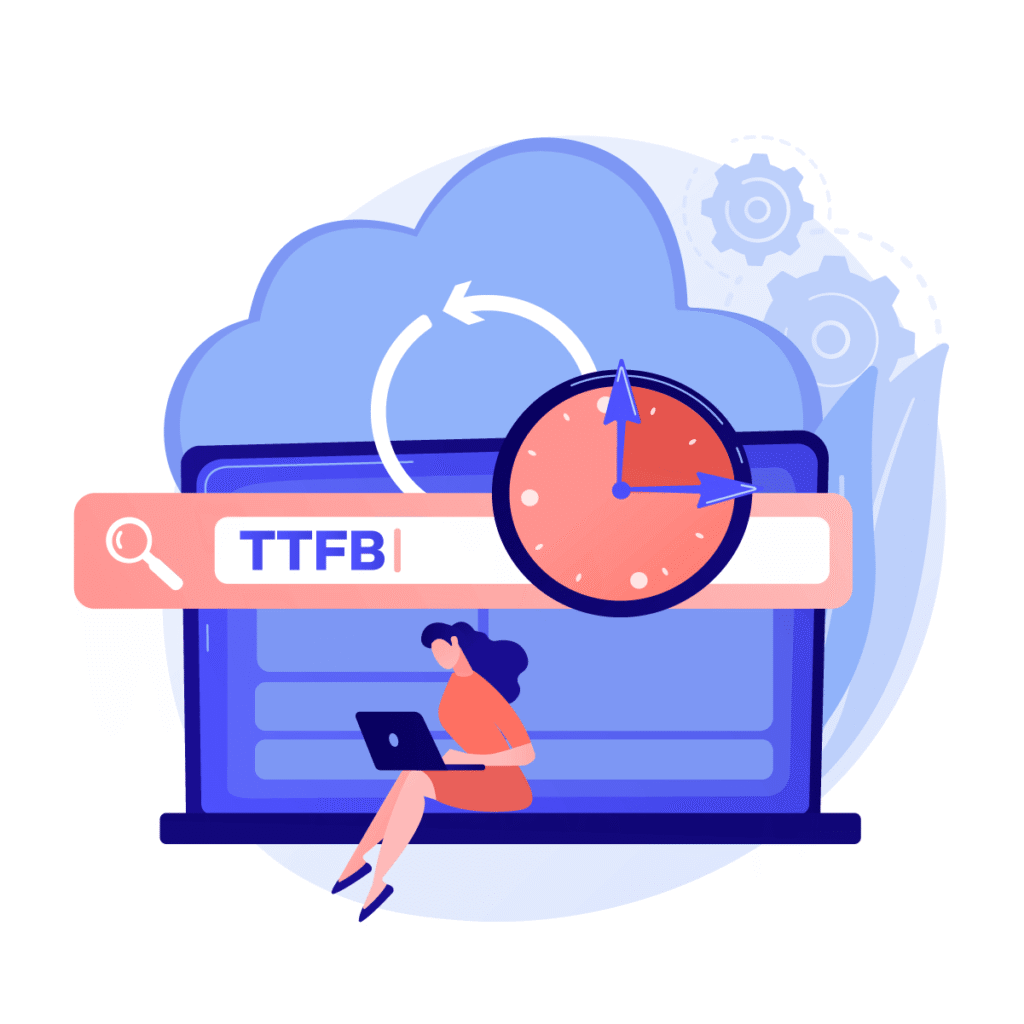
TTFB is the delay between a client’s request and the first byte of the page received by the browser. This delay includes not just your server’s processing, but also the network journey: DNS lookup, TCP connection, TLS handshake, and any redirects before the final response. In the browser’s dev tools, the TTFB appears as the “Waiting for server response” time (green bar above). The shorter this waiting time, the faster the page can start rendering. Our goal in this article is to reduce that waiting time through front-end optimizations and smart use of CDNs.
Table of Contents
In Part 1 of this series, we tackled server-side performance (optimizing queries, PHP execution, and server caching) to improve Time to First Byte. In this Part 2, we shift focus to front-end and CDN-level strategies that can dramatically reduce TTFB from the user’s perspective. Even if your WordPress backend is blazing fast, network factors and delivery configurations play a huge role in how quickly the first byte reaches the browser.
Beyond the Server: Why Front-End Factors Matter for TTFB
A common misconception is that TTFB is purely a server-side metric. In reality, many factors outside your origin server contribute to TTFB. These include DNS resolution, network latency, connection setup (TCP and TLS), and any HTTP redirects, in addition to the server’s own response time. In fact, TTFB measured in real user conditions (field data) will account for all these steps, whereas lab tests that focus only on server processing might ignore network overhead. This means that even after optimizing your WordPress backend (as we did in Part 1), your users might still experience slow first bytes if front-end factors are suboptimal.
For example, a visitor on the other side of the world might suffer a 200ms DNS lookup and a 150ms TLS handshake delay before your server even starts responding. Similarly, an unnecessary redirect could add an extra round trip, penalizing your TTFB. With Google and other performance tools flagging “initial server response time” (TTFB) as a key metric, it’s crucial for WordPress developers to address these front-end aspects. The good news is that by leveraging CDN edge caching and modern web protocols, we can significantly cut down these delays.
Caching at the Edge: Serving HTML from a CDN
One of the most impactful ways to improve TTFB is to cache your site’s HTML output on a Content Delivery Network (CDN) and serve it from data centers closer to your users. CDNs are traditionally used for static assets (images, CSS, JS), but they can also cache entire pages (the HTML) for anonymous users. By doing so, you eliminate the need for the request to travel all the way to your origin server for each page view, and you skip the WordPress processing altogether for cached responses. This drastically reduces TTFB because the first byte can be delivered from a nearby edge server with minimal latency.
Consider that for the vast majority of visitors (who aren’t logged in and see the same content), your pages are essentially static. According to Cloudflare, if HTML can be cached at the edge, the performance gains are substantial – in one case, over 3 seconds faster to start delivering content, compared to hitting the origin every time. Kinsta observed similar benefits: they rolled out edge caching and saw TTFB drop by nearly 48% on average for their customers. These numbers underline how powerful full-page CDN caching can be.
How to implement edge caching: Many CDN providers allow you to enable full-page caching (sometimes called “Cache Everything” or page caching rules). As a WordPress developer, you have a couple of approaches:
- Configure CDN Page Rules or Settings: For example, you might create a rule to cache HTML for all URLs except those with query parameters or except when certain cookies are present. Ensure the CDN is set to respect Cache-Control headers (more on those shortly) or explicitly configure a TTL (time-to-live) for HTML content. Some enterprise CDNs even support advanced options like bypass on cookie (e.g., bypass cache if a wordpress_logged_in cookie is present, meaning the user is logged in). This allows caching for anonymous users while automatically skipping cache for authenticated users.
- Send Cache-Control Headers from WordPress: On the application side, you can send HTTP headers to signal that your HTML is cacheable. For instance, for public pages you might send:
// In a WordPress plugin or theme's functions.php
add_action('send_headers', function() {
    if (!is_user_logged_in()) {
        header('Cache-Control: public, max-age=300, s-maxage=300, stale-while-revalidate=30');
    }
});
- This header tells caches that the response can be stored (public) for 5 minutes. The s-maxage directive specifically targets shared caches (like CDNs or proxies), allowing them to keep the page for 5 minutes. stale-while-revalidate=30 is an optional hint that allows the cache to serve an expired response for up to 30 seconds while it fetches a fresh one in the background. By tuning these values to your site’s update frequency, you can ensure that most users get cache hits and a very low TTFB, while content is still updated relatively quickly when you make changes.
- Ensure Purging on Updates: Caching HTML means you must purge or invalidate that cache when the content changes (e.g. when a post is edited). Many CDN solutions provide an API or even WordPress plugins to purge cache on updates. For example, Cloudflare’s official plugin or other cache plugins can automatically purge the CDN cache whenever you update a post. Make sure to set this up; otherwise users might see outdated content. Edge caching is most effective when it’s transparent – i.e. it “just works” without serving stale pages.
By serving cached HTML from the edge, you effectively decouple TTFB from your WordPress server’s performance. The distance and network latency between users and your server is no longer a bottleneck — the CDN takes care of that. And because the heavy lifting is offloaded, your origin server also enjoys reduced load (it might only handle a fraction of requests, like cache misses or logged-in views). This dual benefit improves scalability and stability. Remember, however, to test your site with caching enabled to ensure everything (like contact forms or CSRF-protected actions) still works as expected. When configured correctly, edge caching is a huge win for TTFB and overall front-end performance.
Upgrade PHP and Enable Opcode Caching
Several factors can lead to a slow LCP on WordPress sites. Understanding these WordPress runs on PHP, so the speed of PHP execution is critical. Two major tips: use the latest PHP version and enable OPcache.
- Use the Latest PHP Version: Newer PHP versions come with significant performance gains. Upgrading from an old PHP 7.x to PHP 8.x can noticeably speed up WordPress page generation. Each PHP release optimizes engine internals; for example, PHP 8.0 introduced a Just-In-Time compiler and other enhancements. Don’t lag behind – running outdated PHP not only slows your site but is also a security risk. Check your WordPress and plugin compatibility, then aim to use PHP 8.1+ (or the latest stable). Back up before updating PHP, and test your site, but rest assured that most well-maintained plugins support current PHP. As Pressable notes, even going from 7.2 to 7.4 yielded improved processing times, so the jump to 8.x is an even bigger win.
- Enable PHP OPcache: OPcache is a built-in bytecode cache for PHP scripts. It dramatically reduces server response time by eliminating the need to recompile PHP files on every request. With OPcache, the first request compiles the PHP code into bytecode and stores it in shared memory; subsequent requests can execute the precompiled code immediately. This can cut down PHP execution time substantially, especially on high-traffic sites where the same pages are hit often. Make sure OPcache is enabled in your php.ini (opcache.enable=1) and allocate enough memory (e.g. opcache.memory_consumption=128 or more for large sites) so that your WordPress application’s code can be cached. Most hosts have OPcache on by default, but verify it’s active by checking your PHP info or using a plugin like Query Monitor (it will show if OPcache is running). If you’re on a default OPcache config, consider tuning it: increase opcache.max_accelerated_files if you have many PHP files (WordPress core + plugins can be thousands of files), and ensure opcache.validate_timestamps is On (so updates to PHP files take effect, unless you prefer to flush cache manually on deploy). The bottom line: OPcache is low-hanging fruit for faster TTFB, so use it. (Note: OPcache comes with PHP; you typically don’t need to install anything extra, just enable and configure it.)
By running a modern PHP engine with OPcache, you reduce the raw time the server spends executing WordPress PHP code on each request. This forms a cornerstone of backend performance.
Using Modern Protocols: TLS 1.3, HTTP/2, and HTTP/3
Another front-end factor influencing TTFB is the efficiency of the HTTP protocol and TLS (HTTPS) handshake used when connecting to your site. Upgrading to the latest web protocols can shave off precious milliseconds before that first byte is sent.
TLS 1.3: If your site is served over HTTPS (as it should be), the TLS handshake is one of the first things that happens when establishing a connection. Older versions of TLS (1.2 and below) require two round trips between the browser and server before data can start flowing. TLS 1.3, the latest version of the protocol, cut this down to one round trip. Fewer round trips = shorter delay. In practice, enabling TLS 1.3 can reduce the HTTPS connection setup time significantly, especially on high-latency connections (mobile networks, transcontinental links). Additionally, TLS 1.3 introduced a feature called 0-RTT (Zero Round Trip Time) for repeated visits. 0-RTT allows a returning visitor to resume a previous session without a full handshake, essentially sending data with the first packet. This means a returning user (within a certain time window) might experience virtually zero handshake delay. As a WordPress developer, you typically don’t have to code anything to use TLS 1.3 – just ensure it’s enabled on your server or CDN. Most modern hosting and CDN providers support TLS 1.3 by default now, but it’s worth double-checking your TLS settings.
HTTP/2 and HTTP/3: HTTP/2 is now the standard for HTTPS connections and most WordPress sites on HTTPS are already using it (browsers will negotiate HTTP/2 automatically if the server supports it). While HTTP/2 itself doesn’t reduce the initial handshake latency (it still uses TCP and the TLS handshake), it does allow multiplexing of requests, which means after the first byte, the rest of the content can be requested more efficiently. However, the newer HTTP/3(built on QUIC, UDP-based) goes a step further: it significantly speeds up connection setup. HTTP/3 uses QUIC to combine the TCP+TLS handshake into a single quicker process. In fact, HTTP/3 can establish a connection with about 33% fewer round trips than HTTP/2 in many cases. This faster connection directly lowers TTFB, since the browser spends less time “negotiating” and can start receiving data sooner. Many CDNs (and some host providers) already offer HTTP/3 support. As a developer, enabling HTTP/3 might be as simple as toggling a setting in your CDN dashboard or ensuring your server software (like Nginx or Apache with appropriate modules) is configured for it. Keep in mind that HTTP/3 requires user browsers to support it too – most modern browsers do, gracefully falling back to HTTP/2 if not.
Practical tip: Make sure HTTP keep-alive is enabled (it usually is by default in HTTP/2/3). This allows the same connection to be reused for multiple requests (HTML, CSS, JS, etc.), avoiding additional handshake overhead for subsequent resources or page navigations. In WordPress terms, if a user navigates from one page to another in quick succession, a keep-alive ensures the TCP/TLS connection stays open between pages, so the second page’s TTFB doesn’t include another full handshake. Modern protocols handle this automatically, but avoid any configuration that might be closing connections too early.
By adopting TLS 1.3 and HTTP/2/3, you’re essentially using a faster “lane” on the web for your content. These upgrades don’t change your WordPress code at all, but they improve the infrastructure that delivers your bytes. The result is a lower network latency contribution to TTFB, which coupled with caching, means users get that first byte as quickly as possible.
Optimizing DNS and Network Connections
Before a browser can even connect to your server, it must resolve your domain name to an IP address via DNS (Domain Name System). DNS lookup time is a component of TTFB that is often overlooked. If your DNS provider is slow or if the user is far from your domain’s nameservers, it can introduce hundreds of milliseconds of delay. For example, using a premium DNS provider or a DNS service with a globally distributed network can markedly reduce lookup times – tests have shown that managed DNS services like Amazon Route 53 or Cloudflare DNS can respond significantly faster (lower latency) than some default or free DNS services. As a WordPress developer, you might not directly manage DNS through code, but you should ensure the site is using a reputable DNS provider with an Anycast network (Anycast DNS serves queries from the nearest location to the user, speeding up resolution). Often, this is a simple switch in your domain settings that can cut down TTFB by tens of milliseconds or more.
DNS best practices: If your WordPress site loads assets from multiple domains or subdomains (for instance, a CDN domain for images, or external service domains), each of those may require a DNS lookup. Consider consolidating critical resources under as few domains as possible to avoid extra DNS lookups on initial page load. For resources that must be on third-party domains (like analytics or social scripts), you can use <link rel=”dns-prefetch” href=”https://third-party.com”> or <link rel=”preconnect” href=”https://third-party.com”> in your HTML <head> to hint to the browser to resolve and even initiate a connection to those domains early. While this doesn’t directly reduce the TTFB of your page’s HTML, it does optimize the overall load sequence (ensuring that secondary requests aren’t blocked by DNS). But again, for the main document TTFB, the focus is on your domain’s DNS.
Network connection reuse: In addition to DNS, the TCP connection setup is a factor (for non-HTTP/3 connections). Generally, there’s not much a developer can do about the speed of TCP handshake beyond using a CDN (since a CDN edge will have a shorter, faster route to the user) and ensuring your server is geographically close to your audience. One thing to avoid is any setup that breaks connection reuse. For example, if you have an HTML meta refresh or JS that immediately redirects to another domain on load, the browser might not reuse the same connection, defeating keep-alive benefits. It’s a rare scenario, but basically, maintain consistent use of your domain for the initial request and avoid unnecessary cross-domain hops at the network layer.In summary, choose a fast DNS, keep an eye on how many distinct domains your pages call early on, and lean on CDNs which often include both DNS and network optimization. These steps will trim the “waiting” time that comes before your server even gets involved. It might seem like shaving off 50ms here or 100ms there, but it all adds up — and for users on slower networks, efficient DNS and connections can make the difference between a sub-second TTFB and a sluggish experience.
Eliminating Redirects and Reducing Request Chains
Redirects are the silent TTFB killers. Each HTTP redirect response (3xx status) means the browser has to make an additional request and wait for another response before finally getting the content. It’s not uncommon to find WordPress sites where a user types http://example.com and the sequence goes something like:
- http://example.com → 301 Redirect → https://example.com (force HTTPS)
- https://example.com → 301 Redirect → https://www.example.com (add “www”)
- https://www.example.com → HTML content delivered
Even though each redirect might only take a fraction of a second, together they add up directly into your user’s TTFB. In the above scenario, the user’s browser had to wait through two additional round trips before the real page began to load. This can easily add 0.5s or more to the TTFB, especially on slower connections. The solution is straightforward: minimize and consolidate redirects. Ideally, one redirect or none at all. If you need to move users to a different host or protocol, combine steps. For instance, if you want all users on https://www, then an incoming http://example.comshould redirect directly to https://www.example.com in a single step. Most WordPress sites can achieve this via their hosting config or a plugin – for example, in Apache or Nginx you’d set a rule that catches both the protocol and host and sends one redirect. There’s no reason to chain through two or three hops.
Additionally, consider setting up HSTS (HTTP Strict Transport Security) if you have a fully HTTPS site. HSTS informs browsers to always use HTTPS for your domain, which means users who have visited before won’t even attempt the HTTP version (avoiding that redirect entirely on subsequent visits). It doesn’t help on a first-ever visit, but it’s a nice optimization for return visitors and generally a security best practice.
Also be mindful of any application-level redirects: for example, a WordPress plugin that forces locale or mobile site redirects, or a custom loader that sends users around. Each extra trip hurts TTFB. If you detect such patterns in your site (use tools like Lighthouse or WebPageTest which will flag redirect chains), refactor to cut them out. Sometimes a redirect is unavoidable (such as migrating a domain or rebranding), but keep them to a minimum and temporary when possible.Lastly, avoid any “chained requests” where the HTML of your page immediately triggers another full page request. This is uncommon, but something like <meta http-equiv=”refresh” content=”0; url=second-page.html”> or certain single-page-app setups could cause a similar effect. Your goal is for the browser to get the final HTML content in one shot, not after a series of detours. By serving the content on the first response, you ensure the TTFB metric reflects just one server response time, not cumulative delays of many.
TTFB for Personalized vs. Non-Personalized Content
Thus far, we’ve mainly discussed strategies that work best when your content is the same for all users (or “anonymous” visitors). But what about scenarios where the HTML is personalized per user? For example, a logged-in user might see their name, a custom dashboard, or items in their cart on the page. By default, caching is turned off for logged-in WordPress users specifically because the content can be user-specific. This creates a challenge: personalized pages often have inherently slower TTFB because they cannot be served from cache – every request has to hit the origin server and generate fresh HTML. It’s important to recognize this divide: your site’s TTFB might be super fast for public users and slower for logged-in users, and that’s expected to some degree. However, there are ways to optimize even personalized content TTFB:
- Cache what you can, and isolate the personalized parts: A common technique is to serve a mostly static page that is cacheable, and then fill in personal data via client-side requests (AJAX) or JavaScript. For instance, you could cache the overall page template and then use an API call to load the user’s name or account info after the initial HTML loads. This way, the main HTML can still be edge-cached for everyone, and only a small part is fetched separately for the logged-in user. This approach keeps TTFB low for the bulk of the content. (It does, admittedly, complicate development a bit, and might not suit every scenario).
- Use segmented caching (vary on cookies): Some CDNs and caching solutions allow you to vary the cache based on a cookie or user segment. For example, you might have a cache for “guest users” and a different cache for “paying customers” if the page differs in a predictable way. In practice, Cloudflare’s Enterprise plan and others let you bypass cache when certain cookies are present. On more accessible setups, you could mimic this by setting cache keys that include user roles (if you have a small, known set of variations). The idea is to still cache responses, but in multiple buckets. Note: This can get complex and heavy on cache storage if overused.
- Microcaching and dynamic data lifespan: If truly every user’s page is unique (like an account dashboard), full edge caching may be off the table. But you can still employ microcaching at the server level. For example, cache each user’s page for a very short time (a few seconds or a minute). This won’t help the first view, but if that user refreshes or makes another navigation quickly, they might hit the cache. This is more of a server-side tactic (possibly covered in Part 1 with object caching, etc.), but it’s worth noting as it straddles front-end and back-end.
In many WordPress sites (blogs, publications, marketing sites), the vast majority of pages are not personalized for each user. Those should be aggressively cached and optimized for TTFB as discussed. For the portions that are personalized (like a user profile or WooCommerce cart), accept that TTFB will be higher and focus on backend efficiency for those paths. Also, measure TTFB for logged-in vs logged-out scenarios separately. It’s normal that a test with a logged-in cookie might show a slower TTFB – the key is that your anonymous experience (which affects first-time visitors and SEO crawlers) is as fast as possible. As a developer, design your site such that heavy personalization is done after the initial page load or via asynchronous calls, whenever feasible, to avoid slowing down the critical first byte of the main HTML.
Leveraging Cache-Control Headers and HTML Cacheability
We touched on Cache-Control headers earlier, but they’re important enough to merit a closer look. These HTTP headers are the mechanism by which you communicate cache preferences to browsers and intermediary caches (like CDNs). A developer-focused understanding of them will help you fine-tune how your WordPress site’s content is cached, which in turn affects TTFB for repeat views and global users.
Cache-Control basics: A response header like Cache-Control: public, max-age=300 means “this response can be cached by anyone (public), and it’s fresh for 300 seconds.” After 300 seconds, a cache should consider it stale and revalidate or fetch a new copy. When you have a CDN in front, it will cache the response if it’s allowed to (most CDNs cache only certain content by default, or require a rule for HTML). By setting public, max-age on your HTML, you are explicitly allowing caches to store it. Contrast this with the default behavior of many WordPress pages which might send no-cache or max-age=0 for HTML (or none at all), which tells CDNs not to cache or to always revalidate. By configuring proper Cache-Control headers, you turn on caching for your pages.
For example, if you run a news site where articles rarely change after publication, you might set a long max-age (say an hour or more) for article pages, knowing that when you publish updates you’ll purge the cache manually. On the other hand, if content changes frequently or you just want safety, you might use a shorter max-age or rely on stale-while-revalidate to keep content updating in the background.
Different directives for different caches: One useful directive is s-maxage. This stands for “shared max-age” and is honored by proxy caches (CDNs) but not by browsers. You might set a long s-maxage and a shorter regular max-age. For instance: Cache-Control: public, max-age=60, s-maxage=3600. This could signal that the user’s browser should only cache the page for 60 seconds (to pick up new content frequently), but the CDN can cache it for an hour (to reduce load on origin). The CDN will still revalidate after an hour or sooner if you purge. Meanwhile, a returning user within 60 seconds gets a cached copy from their own browser cache (which is basically instant, zero TTFB in that case!).
No-cache for dynamic parts: For pages that should never be cached, you’ll want to send headers to that effect. Logged-in pages in WordPress typically send Cache-Control: no-store, no-cache, must-revalidate (and also send a private directive or omit public). This ensures intermediate proxies don’t accidentally cache personalized data. Check your site’s headers using your browser’s network panel or tools like curl -I to see what Cache-Control is being sent for various pages. Adjust as needed via your server config or WordPress plugins/hooks.
Example – setting headers by condition: You might use a snippet (similar to the earlier example) to adjust headers. If you use Apache, you could use .htaccess rules or if using Nginx, in your server block with add_header. Many WordPress caching plugins also let you specify Cache-Control values for content. Just ensure you don’t end up with conflicting rules (some plugins or host platforms enforce their own headers).
Pitfalls: Be careful with HTML caching in the browser when using cookies for session or login. For example, if a user logs out, they might still have a cached copy of a page that was from when they were logged in (showing their name, etc.), if your cache headers allowed it. A common practice is to vary cache behavior on login state: e.g., send Cache-Control: private, no-cache for logged-in users (so their pages aren’t stored in proxies or other users’ caches), and public for logged-out. If using a service like Cloudflare that caches everything, it’s typically configured not to serve cached HTML to someone who has a WordPress login cookie (as noted earlier). This can be managed via cookie bypass rules or simply by not setting public cache for those scenarios.
In summary, thoughtful use of Cache-Control headers makes your caching strategy explicit and gives you control over how long pages stay at the edge and in browsers. By maximizing cacheability of non-changing content and properly marking dynamic content, you ensure that your site’s TTFB is optimized for all users. When set up correctly, a repeat visitor might have a near-zero TTFB on a second visit thanks to a cached page, and an international visitor might get the page from a nearby CDN PoP (Point of Presence) without ever touching your origin server. Those are big wins, enabled by a few header directives.
Final Thoughts and Next Steps
Front-end and CDN-level optimizations are the natural complement to backend performance tuning. By caching content at the edge, using modern protocols, optimizing DNS, and cleaning up request flows, a WordPress developer can ensure that users get a fast response no matter where they are. The Time to First Byte is the first impression of your site’s speed – a fast TTFB means the page is on its way and everything else can load sooner. Improvements here tend to positively impact other metrics across the board (a 300ms faster TTFB is 300ms faster LCP in many cases, for instance).
It’s worth noting that while we avoided deep dive into measurement, you should monitor your TTFB as you make changes. Use tools like Chrome DevTools, Pingdom, WebPageTest, or curl to measure the before-and-after. For example, run curl -o /dev/null -s -w ‘%{time_starttransfer}\n’ https://yoursite.com to get the TTFB from a certain location, or check the Network panel in your browser for the “Waiting (TTFB)” time. If you have global users, test from multiple regions (CDN edge caching should make each region faster after the first hit). This observational step will validate that your front-end optimizations are working – it’s always satisfying to see that TTFB drop from say 800ms to 100ms due to a cache HIT at the edge!
By combining the server-side tactics from Part 1 with the front-end and CDN strategies discussed here, you’ll be well on your way to a snappy, low-TTFB WordPress site. Users will enjoy near-instant page starts, and you’ll have built a more scalable and resilient architecture. Stay tuned for a potential Part 3, where we might explore deeper diagnostics and advanced techniques for TTFB (such as using performance budgets, server-timing APIs, and more). For now, happy optimizing – that first byte can’t arrive fast enough!
Follow Us for Ongoing WordPress Insights
Stay informed about the latest in WordPress security:
- Follow our blog at osomstudio.com/blog
- Connect with us on Twitter @osom_studio
- Follow our LinkedIn profile: https://www.linkedin.com/company/osom-studio/
Remember, every day without proper security measures is a day your site is at risk. Don’t wait for a breach to take action. Whether you’re using our free checklist, scheduling a call, or following our updates, you’re taking important steps towards a more secure WordPress future.
At Osom Studio, we’re committed to being your long-term partners in WordPress security. Take the first step today – your secure WordPress journey starts now.
Next article
WordPress Security Guide 2026: 20+ Steps to Protect Your Site
By Bartosz Nowak
9 min read
